To create Barcodes in MS Excel, make sure your MS Excel have "Libre Barcode 39" font, as shown in below imageIf you do not have this font, click here to know How to easily download and install "Libre Barcode 39" to your MS ExcelAfter installing the font, follow these easy steps to create Barcodes in MS Excel
Step 1: In a blank column type the first number along with the asterisk "*" symbol at the beginning and at the end of that number as shown in the below image
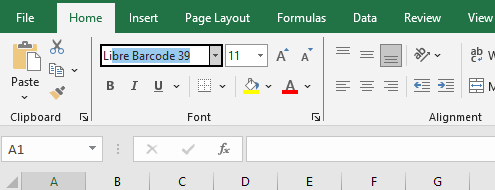
Step 2: after that, select that first number and go to "Data Tab" and then click on the option "Flash Fill" thereStep 3: After clicking the "Flash Fill" option, it will automatically fills the remaining numbers as shown in below imageStep 4: After that, select all those numbers and go to "Home Tab" and select "Libre Barcode 39" Font and hit enterIf you open the full list of fonts, you will not find this font by the name "Libre Barcode 39"Instead you will see the barcode images there as shown in below image
Step 5: After you select the font, your numbers will be converted into Barcodes.
If your Barcodes are looking Small, you can select all of them and increase the font to make them look bigger
If you still have any doubts, you can comment it down below


Comments
Post a Comment